Updated on 2025-04-23 / iPhone Tips
Switching between operating systems manually can be time-consuming. iReboot simplifies this process by letting you reboot into another OS with a single click.
iReboot, by NeoSmart Technologies, sits in your system tray for quick OS selection without a full shutdown-restart. In this guide, we’ll explore iReboot’s key features, how to ireboot download and install it, and how it compares with alternatives.
- Part 1: What is iReboot?
- Part 2: How to Download and Install iReboot [Free Download]
- Part 3: How to Use iReboot
- Part 4: Free vs. Pro Version
- Part 5: Alternatives to iReboot
- Part 6: Bouns Tips. Fix iOS Issues Effortless with Best iOS System Repair Tool
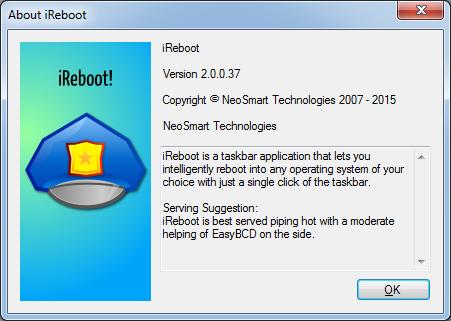
Part 1: What is iReboot?
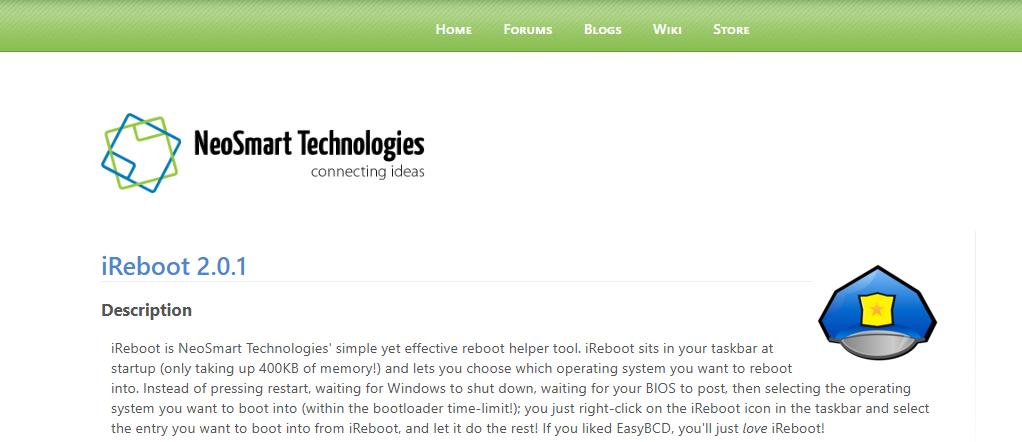
iReboot is a lightweight boot management tool developed by NeoSmart Technologies. It allows users to switch between multiple operating systems without manually rebooting their computers. Instead of shutting down and selecting an OS during startup, iReboot enables direct OS switching from the system tray.
Key Features of iReboot:
- Quick OS switching without manual rebooting
- Sits in the system tray for easy access
- Supports dual-boot and multi-boot setups
- Lightweight and does not consume system resources
- Free to use with a Pro version offering advanced features
Part 2. How to Download and Install iReboot [Free Download]
Downloading iReboot is quick and hassle-free. Follow these steps to get started:
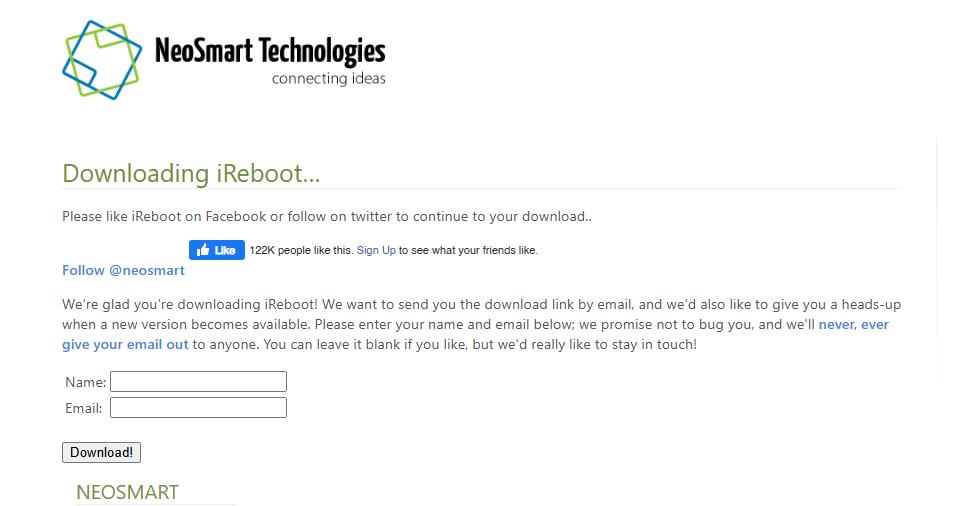
Step 1: Visit the official NeoSmart Technologies website. Open your web browser and go to the official page for iReboot.
Step 2: Click the Download button. Locate the iReboot download link and click to start downloading the setup file.

Step 3: Provide your Name and Email (if required). Some versions may ask for this information before proceeding.
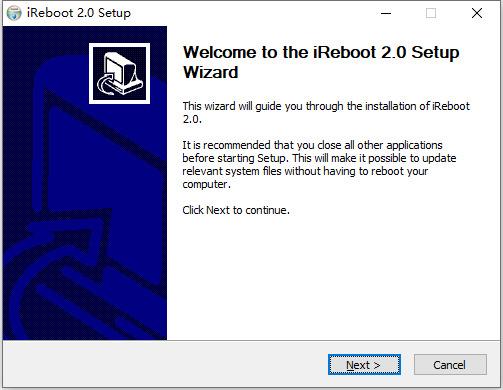
Step 4: Run the setup file. Once the download is complete, locate the file and double-click to launch the installation.
Step 5: Follow the on-screen instructions. The installation wizard will guide you through the steps to install iReboot properly.
Step 6: Confirm installation. Once installed, you will find iReboot in the system tray at the bottom-right corner of your screen.
Part 3: How to Use iReboot
Step 1: Find iReboot in the system tray. After installation, locate the iReboot icon in the bottom-right corner of your screen.
Step 2: Right-click the iReboot icon. This will bring up a menu with available options.
Step 3: Make sure "Reboot on Selection" is enabled. This setting allows automatic switching without requiring additional confirmation.
Step 4: Select your desired operating system. Choose from the list of installed OS options.
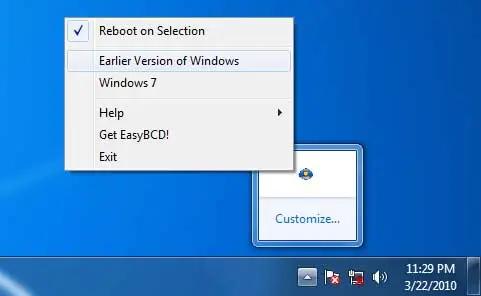
Step 5: Your PC will restart instantly. The system will boot directly into the selected OS without the need for manual input.
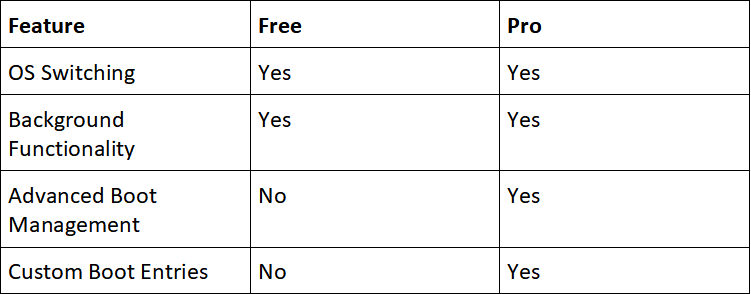
Part 4. Free vs. Pro Version
While iReboot offers a free version with essential features, the Pro version includes advanced tools for better OS management. Here’s a comparison:
Part 5: Alternatives to iReboot
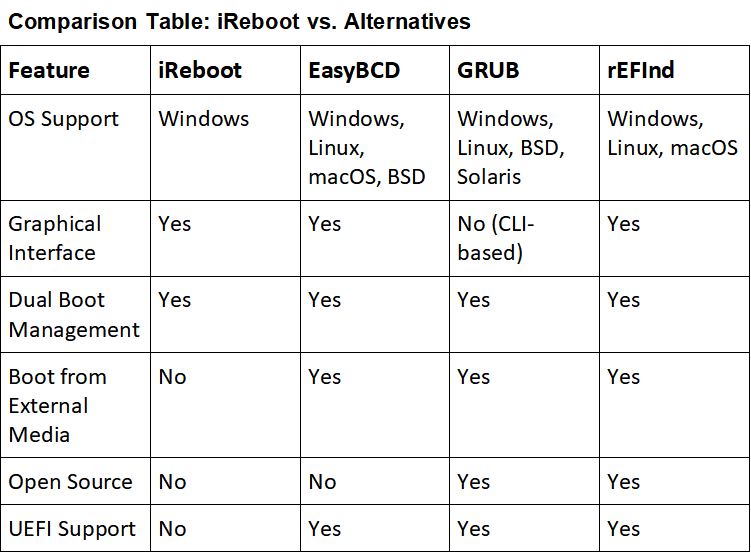
If iReboot doesn’t fully meet your needs, consider these alternative boot management tools:
1. EasyBCD
EasyBCD is a feature-rich boot manager that provides extensive customization options. It allows users to create, edit, and manage boot entries, making it an excellent choice for dual-boot setups. Key features include:
- Support for Windows, Linux, macOS, and BSD.
- Ability to boot from ISO images, USB drives, and network sources.
- Built-in recovery and troubleshooting tools.
- Customizable boot menu with multiple OS entries.
2. GRUB (GRand Unified Bootloader)
GRUB is an open-source bootloader commonly used in Linux distributions. It offers robust boot management with features such as:
- Cross-platform compatibility (Linux, Windows, BSD, and Solaris).
- Support for MBR and UEFI boot modes.
- Configurable boot entries with scripting support.
- Advanced recovery options in case of boot failures.
3. rEFInd
Designed for EFI-based systems, rEFInd provides a visually appealing and user-friendly boot manager. Its key advantages include:
- Automatic detection of installed OSes.
- Graphical boot menu with customizable themes.
- Independent operation from the installed operating systems.
- Strong support for macOS, Linux, and Windows dual-boot setups.
Bouns Tips. Fix iOS Issues Effortless with Best iOS System Repair Tool
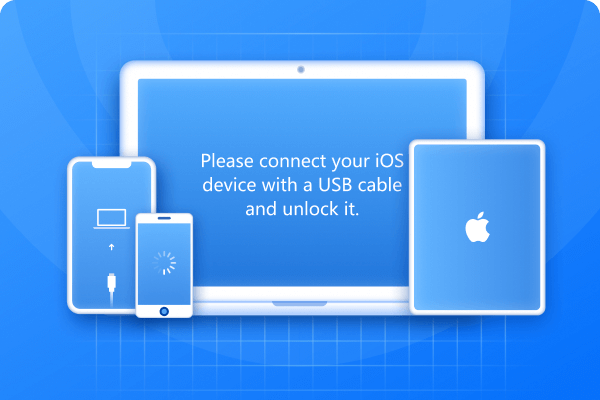
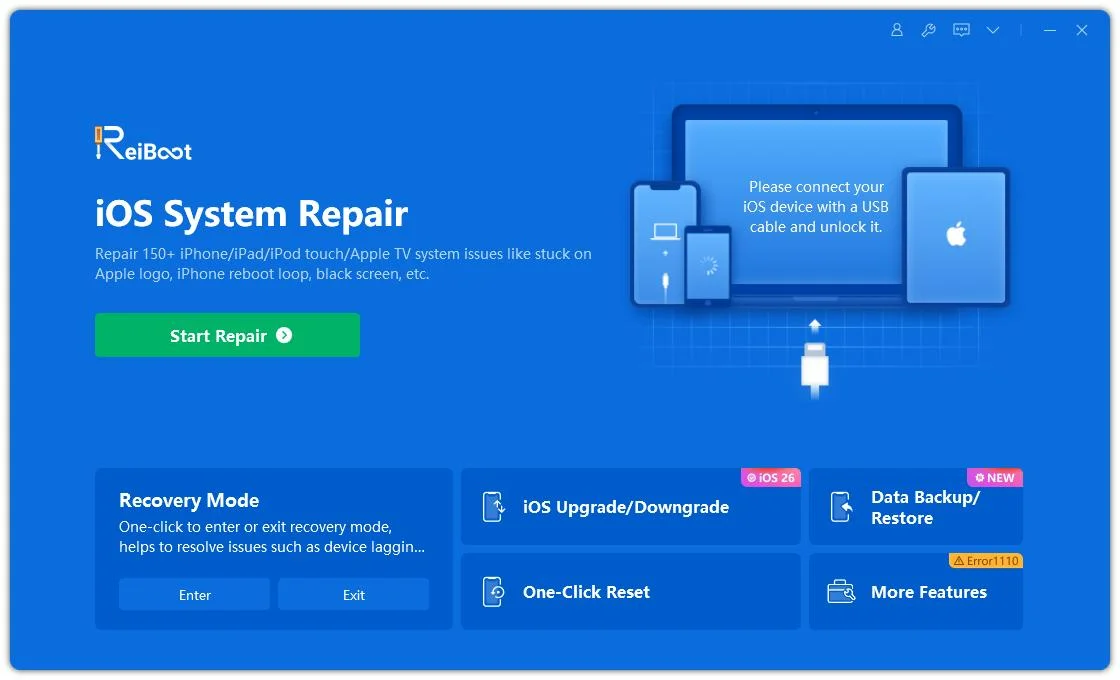
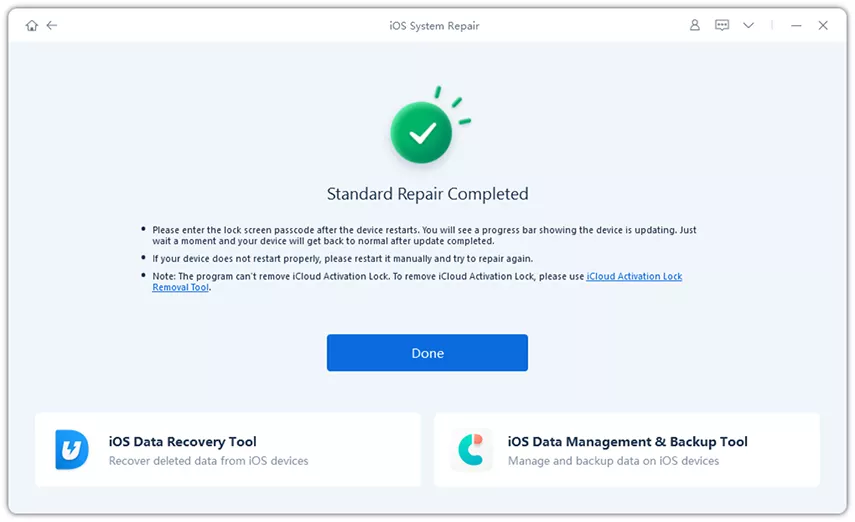
Is your iPhone stuck on the Apple logo, in recovery mode, or experiencing frequent crashes? Fixing iOS issues doesn’t have to be complicated! ReiBoot by Tenorshare is a powerful system repair tool designed to resolve iOS problems with just a few clicks. Whether it’s boot loops, black screens, or freezing, ReiBoot makes iPhone repair effortless—no technical skills required. With a user-friendly interface and advanced repair options, you can restore your device to normal in minutes.
Step 1: Download and install Tenorshare ReiBoot on your computer. Launch the program and connect your iPhone using a USB cable. Click Start Repair to begin.
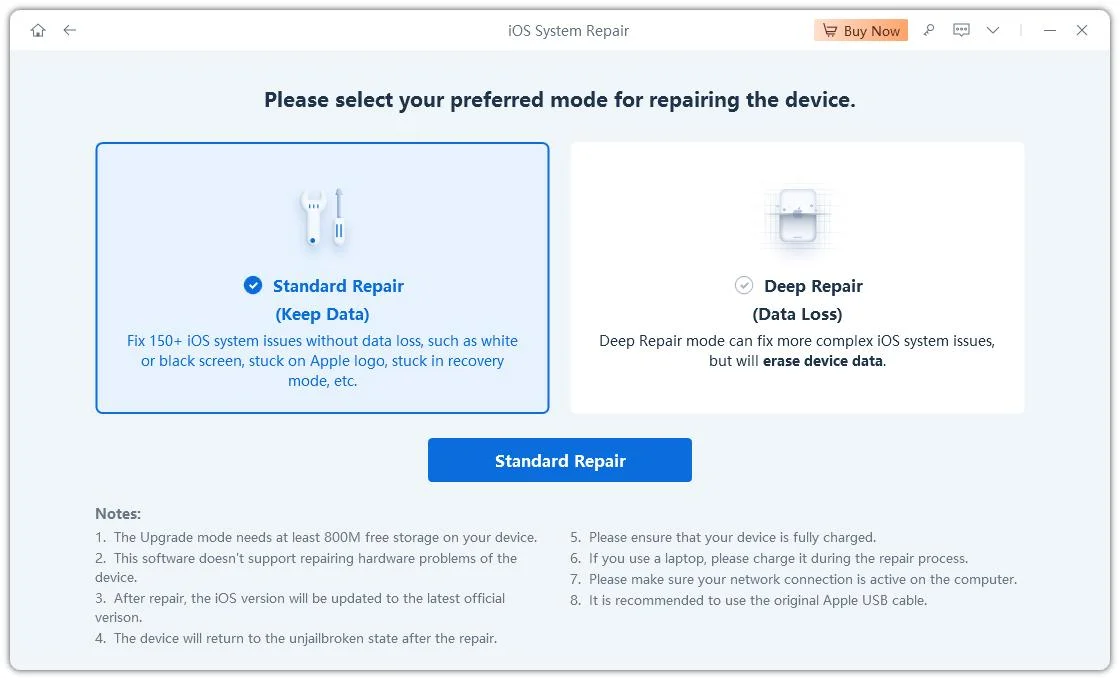
Step 2: Select Standard Repair to fix common iOS issues without data loss. Click Next to proceed.
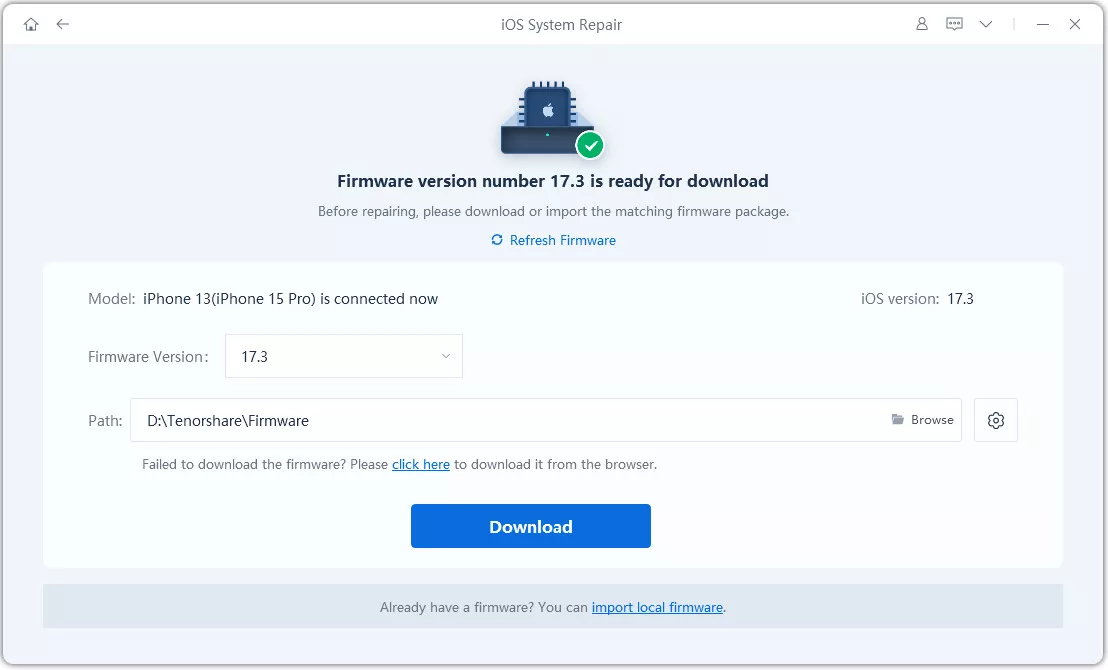
Step 3: Click Download to get the latest firmware package compatible with your device. If you already have it, click Browse to import it.
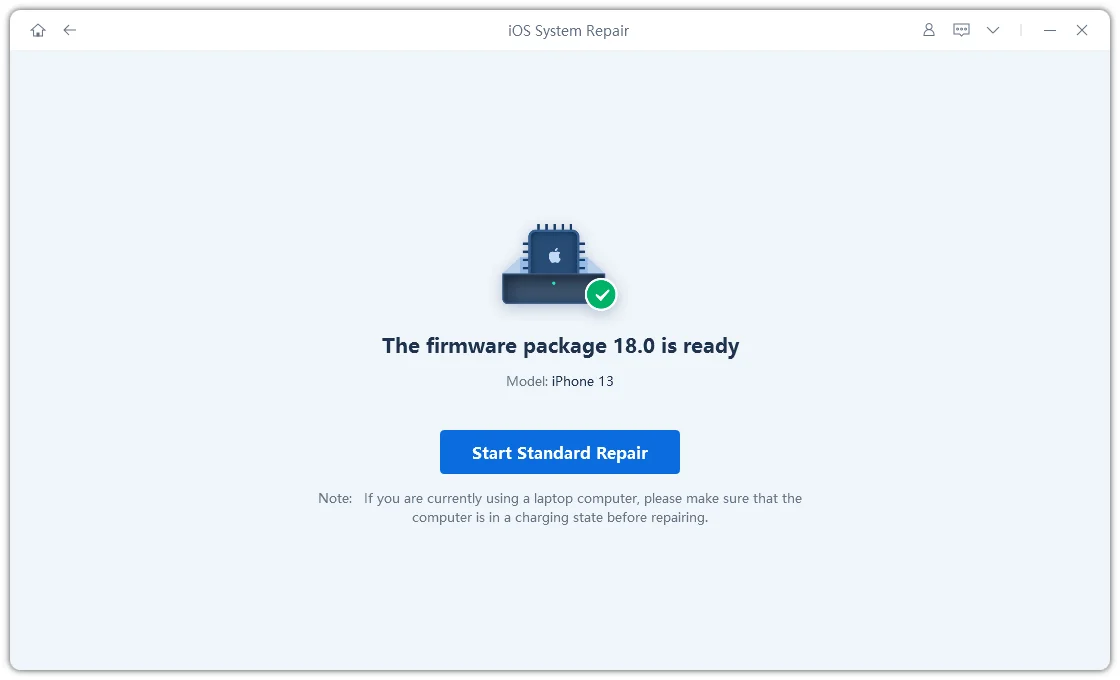
Step 4: Once the firmware is downloaded, click Start Standard Repair and wait for the process to complete.
Step 5: When the repair is done, your iPhone will restart automatically, and your issue should be fixed!
Conclusion:
iReboot makes OS switching effortless, but when it comes to iOS issues, you need a powerful repair tool. Tenorshare ReiBoot is the ultimate solution for fixing boot loops, recovery mode, black screens, and more—all with a single click. No technical skills are required! It’s fast, reliable, and trusted by millions. Say goodbye to frustrating iPhone problems and restore your device to peak performance in minutes. Download ReiBoot today and experience a hassle-free iOS repair!