
Updated on 2024-09-24 / iPhone Tips
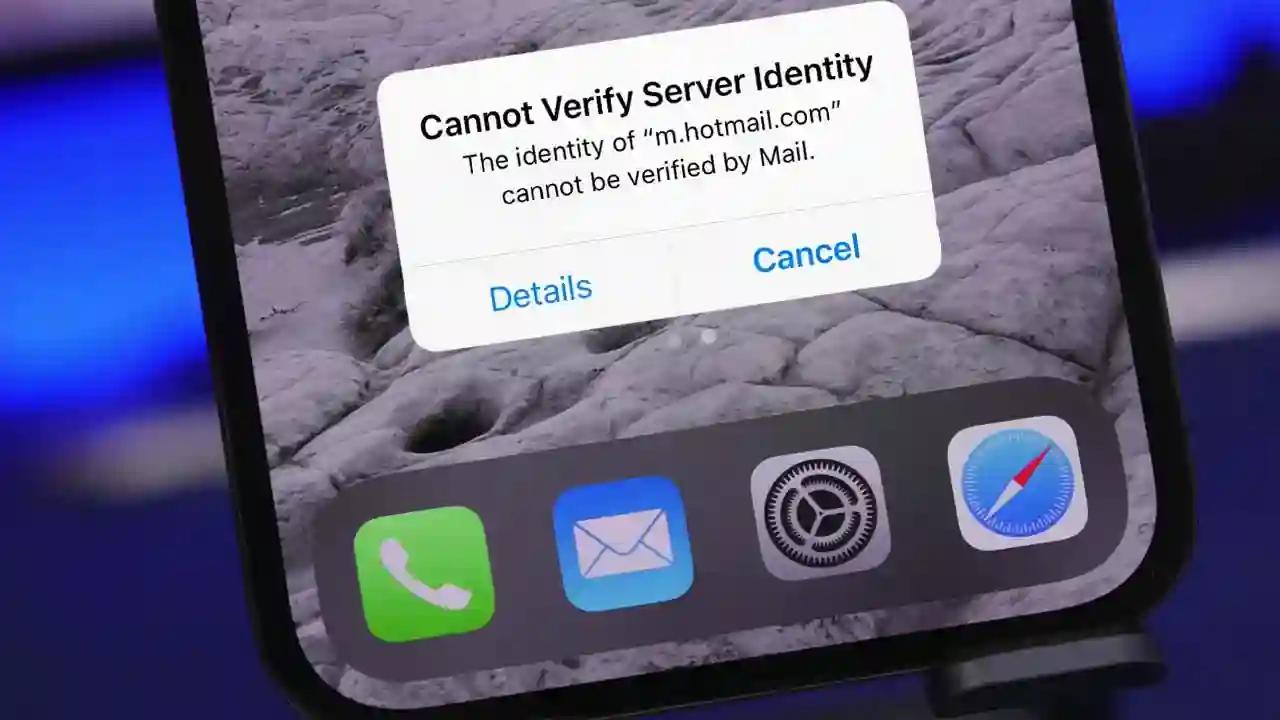
There’s nothing more frustrating than trying to check your emails, only to be met with the persistent “Cannot Verify Server Identity” pop-up on your iPhone or iPad. It’s disruptive, it’s confusing, and it often strikes at the most inconvenient times. If you’ve ever found yourself staring at this message, we’ve got the solution for you. In this article, we’ll tell you why you’re seeing this error and how to fix it.
- Part 1: Understanding the “Cannot Verify Server Identity” Error
-
Part 2:
Guide to Fix the “Cannot Verify Server Identity Keeps Popping Up” Issue
- Method 1: Quit and Relaunch the Mail App
- Method 2: Use a Professional Tool to Fix Cannot Verify Server Identity on iPhone
- Method 3: Check and Correct Date and Time Settings
- Method 4: Update Your Device to the Latest iOS Version
- Method 5: Verify and Reconfigure Email Account Settings
- Method 6: Reset Network Settings
- Method 7: Remove and Re-add Email Accounts
- Method 8: Reset All Settings on Your Device
- Part 3: FAQ
Part 1: Understanding the “Cannot Verify Server Identity” Error
The "Cannot Verify Server Identity" error on iPhone and iPad pops up when your device can't confirm the legitimacy of the server you're trying to connect to, typically your email server. This happens for several reasons:
- Outdated Security Certificates: If the server's certificate is expired or not issued by a trusted authority your iPhone raises a red flag and the “cannot verify server identity” keeps popping up.
- Incorrect Date and Time Settings: If your iPhone's date and time are wrong, it might think the server's certificate is expired even though it's still valid, leading to the “cannot verify server identity” iPhone error message.
- Network Issues: Unstable or unsecured Wi-Fi connections can disrupt the verification process. Malfunctioning network hardware or software on your device or the server can also cause problems.
- Outdated iOS Version:: Older iOS versions might have bugs or compatibility issues with newer security certificates, triggering the “cannot verify server identity iPad/iPhone”.
- Email Account Configuration Issues:: Typos in server addresses, port numbers, or incorrect authentication settings (username/password) can prevent proper communication and lead to the verification failure.
Part 2: Guide to Fix the “Cannot Verify Server Identity Keeps Popping Up” Issue
Let us walk you through a series of tried-and-true methods to resolve the problem, starting with the simplest fixes and gradually moving to more advanced solutions.
Method 1: Quit and Relaunch the Mail App
A simple yet effective first step is to force-quit the Mail app and then relaunch it. This can often resolve temporary glitches that might be causing the error. Follow these steps:
1.Swipe up from the bottom of the screen (or double-click the Home button on older devices) to open the app switcher.
2.Find the Mail app and swipe it up off the screen to close it.
3.Reopen the Mail app by tapping its icon on the Home screen.
Method 2: "Use a Professional Tool to Fix Cannot Verify Server Identity on iPhone
When basic troubleshooting steps fall short, a professional tool like ReiBoot can come to the rescue. Reiboot is designed to fix a wide range of iOS issues, including the persistent “Cannot Verify Server Identity” error. It’s a user-friendly tool that can repair your iPhone’s system without causing data loss, making it the ultimate solution for more stubborn problems.
With its one-click repair process, you can restore your iPhone or iPad to optimal performance quickly and effortlessly.
Why choose ReiBoot?
- One-Click Downgrade: ReiBoot offers a simple and straightforward solution to downgrade iOS 18 Beta to version 17 with just one click.
- All-in-one professional software: Fix 150+ iOS/iPadOS/tvOS/macOS system issues on your iDevice: iPhone unable to verify update, iOS 18 stuck in recovery mode, iOS 18 battery drain and iPhone developer mode not showing...
- Safe and Secure: ReiBoot ensures a safe and secure downgrade process, minimizing the risk of data loss and other potential issues.
- Compatibility: ReiBoot is compatible with a wide range of iPad models and iOS versions, making it suitable for various devices and situations.
- Data Retention: Most importantly,with ReiBoot, users won't lose any data during the downgrade process, ensuring that their important files, photos, and settings remain intact.
Follow these steps to use ReiBoot to fix "cannot verify server identity keeps popping up":
Step 1: Download and install ReiBoot on your computer and connect your iPhone with the computer.
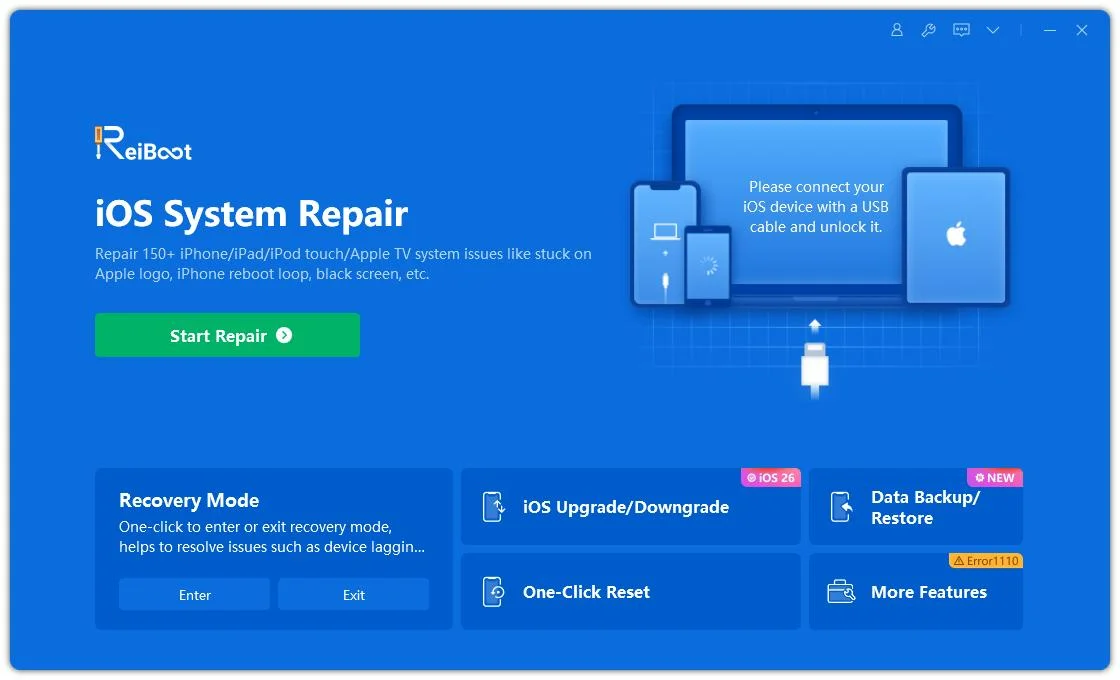
Step 2: Launch the Reiboot software on your computer.
Step 3: Click on the "Start Repair" option.
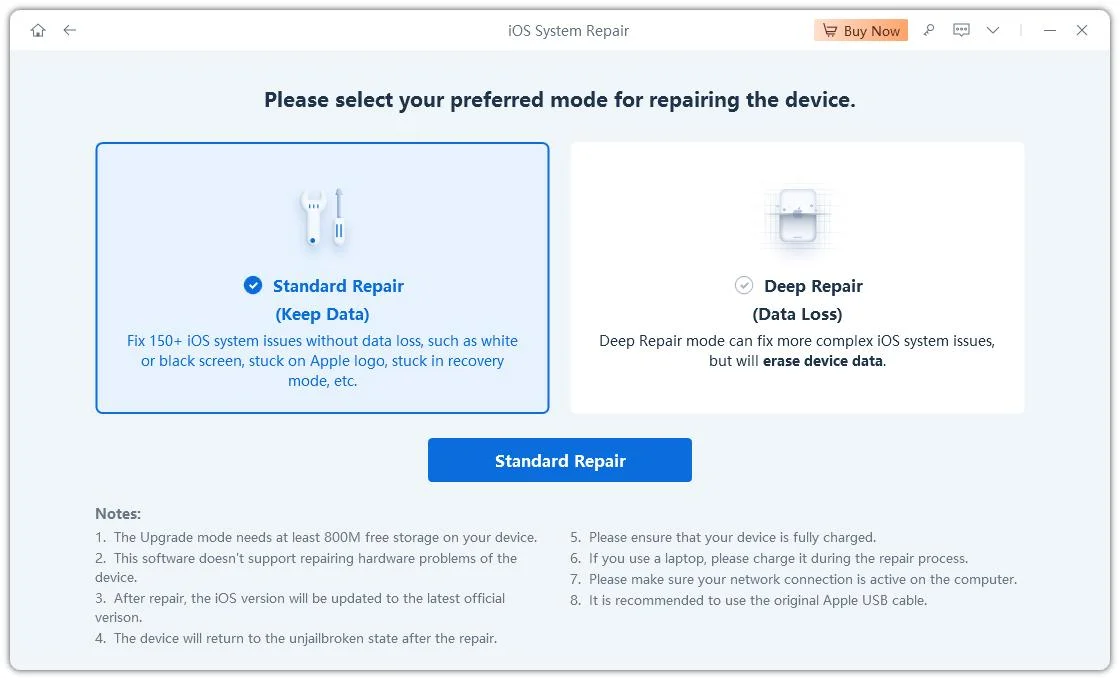
Step 4: Once the device is detected, select the Standard Repair option, then click on the Standard Repair button at the bottom.
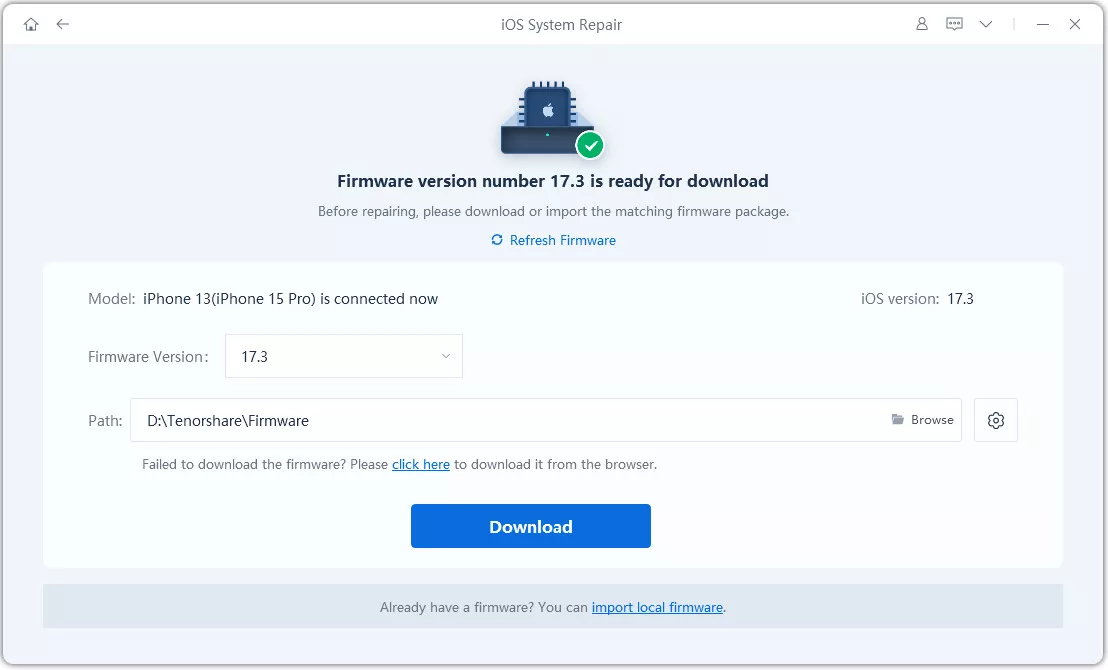
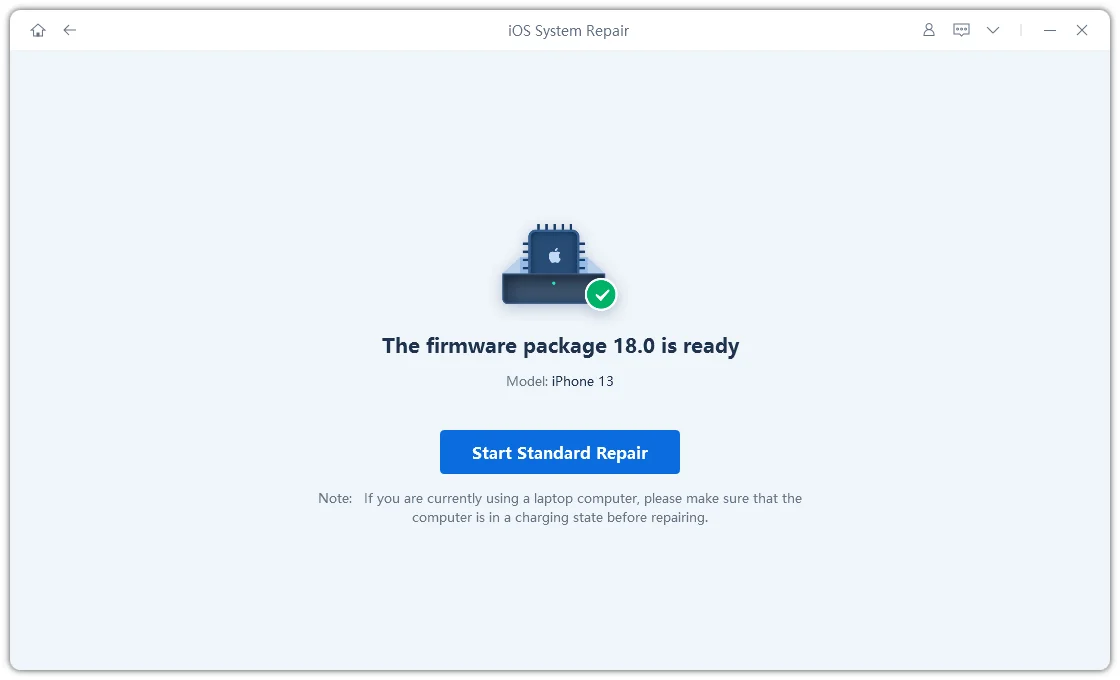
Step 5: Hit on the Download button to initiate the downloading process of the firmware package. If you’ve already downloaded it, click on the Browse button to import it from the computer.
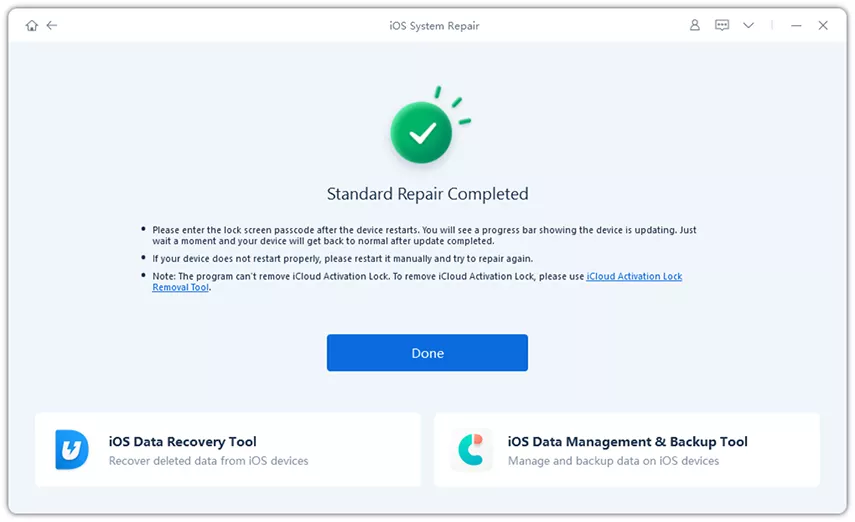
Step 6: Once the downloading is completed, click on the Start Standard Repair option. Wait for the progress bar to get completed.
Step 7: Once the process is finished, your iPhone will restart automatically.
Method 3: Check and Correct Date and Time Settings
An incorrect date and time on your iPhone or iPad can interfere with the verification of server identity. Ensuring these settings are accurate is crucial. Follow these steps:
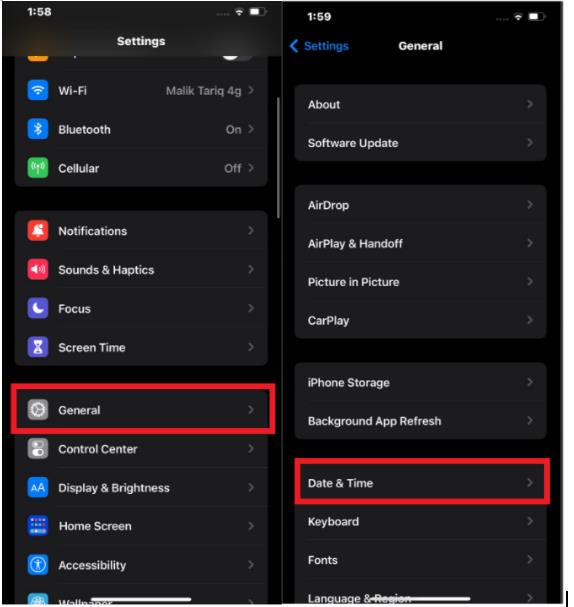
Step 1: Go to Settings > General > Date & Time.
Step 2: Ensure that "Set Automatically" is turned on. This will automatically adjust your device’s time based on your location.
Step 3: If “Set Automatically” is off, manually set the correct date, time, and time zone via the “24-Hour Time” option.

Method 4: Update Your Device to the Latest iOS Version
Outdated iOS versions can sometimes cause compatibility issues with server certificates, leading to the "iPad/iPhone Cannot Verify Server Identity" error. Updating your device to the latest iOS version is recommended.
Step 1: Go to Settings > General > Software Update.
Step 2: If an update is available, you'll see a notification.
Step 3: Tap "Download and Install" to begin the update process.
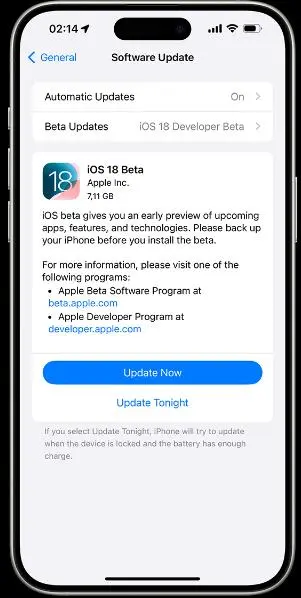
Your device will need to be connected to Wi-Fi and have sufficient battery or be plugged in. Follow the on-screen instructions to complete the update.
Method 5: Verify and Reconfigure Email Account Settings
Verifying and, if necessary, reconfiguring your email settings can help ensure your device is communicating correctly with the email server. Follow these steps to check and update your settings:
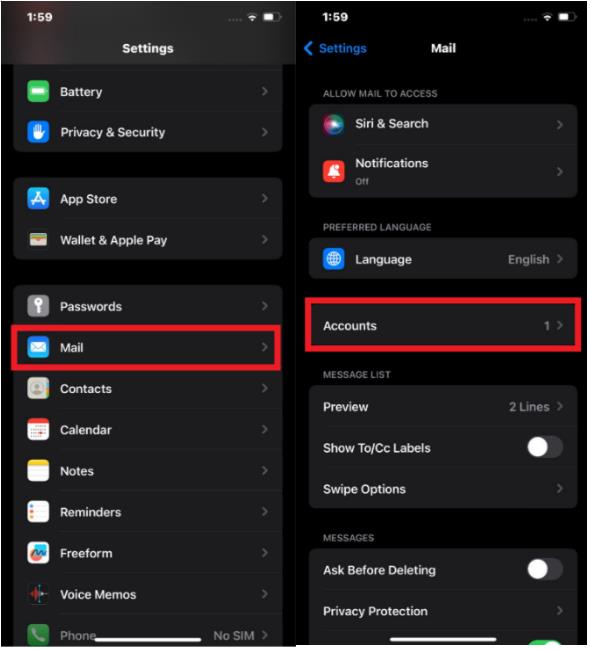
Step 1: Go to Settings > Mail > Accounts.
Step 2: Select your email account.
Step 3: Double-check the incoming and outgoing mail server settings, username, and password. Ensure there are no typos or incorrect values. If necessary, contact your email provider for accurate settings.
Method 6: Reset Network Settings
If your device is struggling to connect to your email server, resetting the network settings can clear any configuration errors or connection issues. Here’s how to reset your network settings:
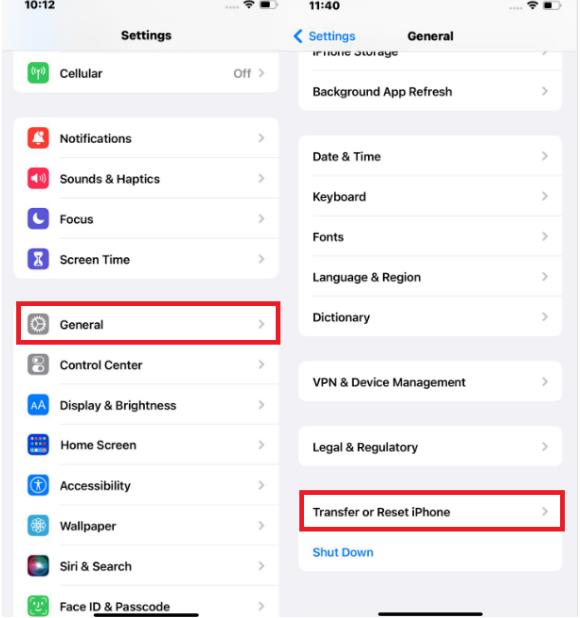
Step 1: Go to Settings > General > Transfer or Reset iPhone.
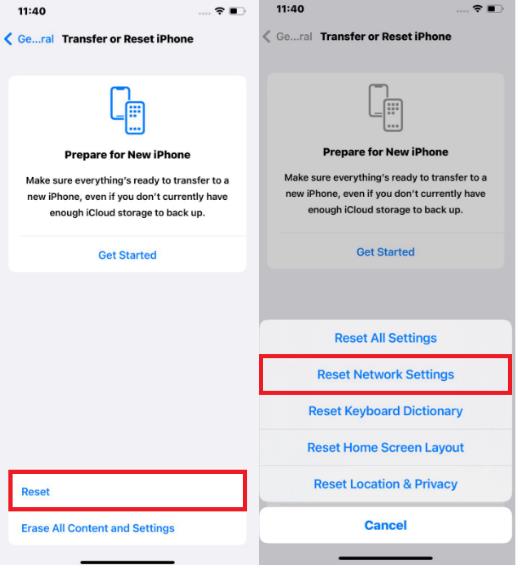
Step 2: Tap Reset.
Step 3: Choose Reset Network Settings and confirm.
Method 7: Remove and Re-add Email Accounts
This method ensures that your email settings are refreshed and correctly aligned with the server. Here’s how to do it:
Step 1: Go to Settings > Mail > Accounts.
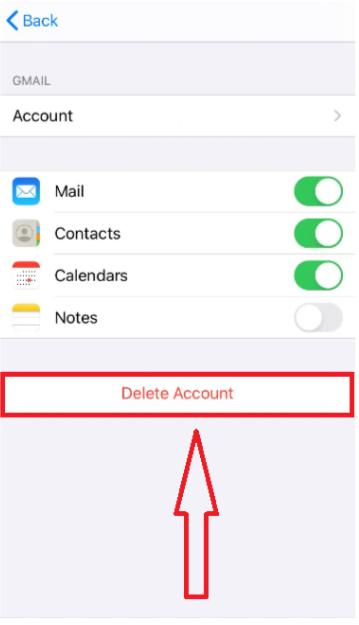
Step 2: Delete your email account.
Step 3: Restart your device.
Step 3: Then, re-add your email account by going to Settings > Mail > Accounts > Add Account. Select your email provider, type in email address, and password and continue.
This can resolve any corrupted data or settings associated with the account.
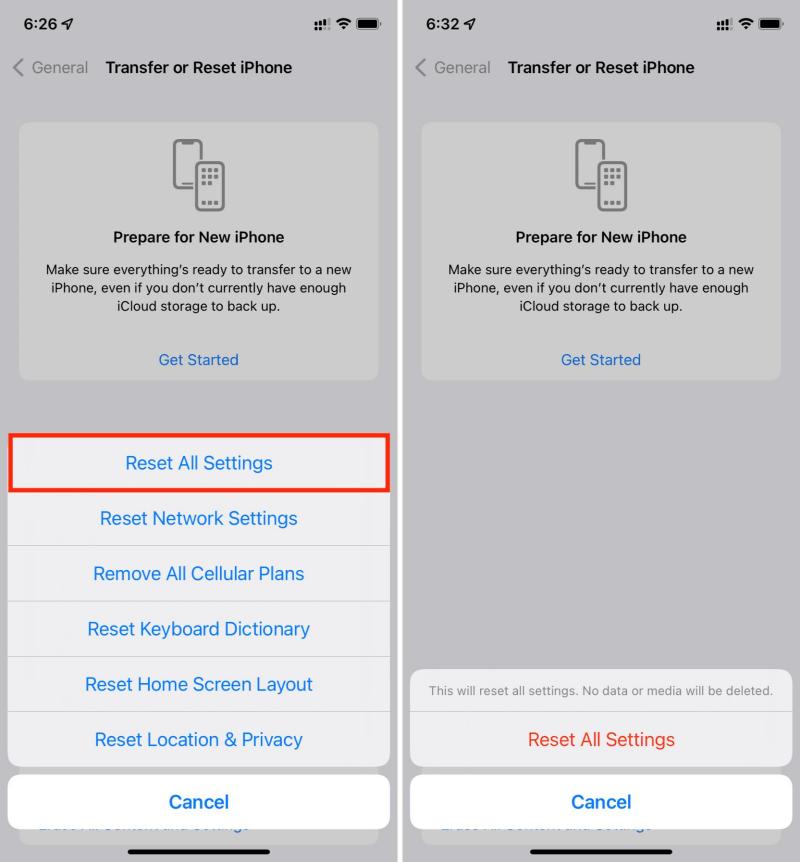
Method 8: Reset All Settings on Your Device
If the “iPhone/iPad Cannot Verify Server Identity Keeps Popping Up” error continues despite other fixes, resetting all settings on your device might be the final solution. This step won’t erase your data, but it will reset system settings such as Wi-Fi passwords, wallpaper, and privacy preferences, which could be causing the issue. Here’s how to reset all settings:
Step 1: Go to Settings > General > Transfer or Reset iPhone.
Step 2: Tap Reset.
Step 3: Choose Reset All Settings and proceed.
Part 3. FAQs
Q1: How do I verify if my email server settings are correct?
To check your email server settings, go to Settings > Mail > Accounts. Select the email account you're having trouble with. Verify that the incoming and outgoing mail server addresses, port numbers, username, and password are correct. If you're unsure, contact your email provider for the accurate settings.
Q2: Do I need to back up my device before resetting network settings or all settings?
Yes, it's highly recommended to back up your iPhone or iPad before resetting network settings or all settings. Resetting these settings will erase certain data and configurations. By backing up your device, you can restore your data if needed. You can back up your device to iCloud or your computer using iTunes or Finder.
Conclusion
When the “Cannot Verify Server Identity Keeps Popping Up” error disrupts your workflow, it’s important to address it quickly and effectively. In this article, we discussed 8 effective methods to solve the problem. From simple fixes like quitting the Mail app or checking your date and time settings, to more comprehensive solutions such as updating your iOS or resetting your network settings, there are multiple ways to resolve this issue.
If you’ve tried these methods and the problem persists, it may be time to consider a professional tool like ReiBoot. ReiBoot offers a reliable and efficient way to repair your iPhone or iPad’s system without losing any data. Whether it’s addressing server identity verification errors or other stubborn iOS issues, ReiBoot does the job flawlessly.